Manuel's 3D Workshop
Manuel's 3D Workshop

Project Overview and Objectives
For this project, part of the Character Animation module, I was tasked with creating two types of animation cycles: a single walk cycle that showcased a character’s personality, and a gameplay-style cycle pack consisting of an idle, walk, jump, and dive, focused mostly on the body mechanics. The project’s main goal was to demonstrate my understanding of character animation fundamentals, particularly the 12 Principles of Animation, while also exploring how motion can express personality and intent.
To do this project, I used Autodesk Maya in a stylized 3D format. For the personality walk cycle, I selected a rig of Tom (from Tom and Jerry) by Mario Furmanczyk. For the gameplay cycle pack, I worked with an Azula rig by Mattathias, based on the character from Avatar: The Last Airbender. These two characters were chosen not only because of their strong personalities but also because of the emotional and physical range they offer for me to explore with.


This project was a valuable opportunity to apply the technical and artistic knowledge I’ve been building throughout this term: planning, posing, timing, and polishing; all while telling a story through motion.
Concept and Character Choice
When thinking about the direction I wanted this project to take, I wanted to work with characters that had well-defined personalities and expressive body language. This would allow me to focus on giving the animations a unique perspective while still grounding them in believable motion as both of them are humanoid and these are movements we, as humans, are more acquainted with.
For the personality walk cycle, I chose Tom from Tom and Jerry. His exaggerated, cartoonish movements and expressive range made him ideal for a walk cycle that conveyed confidence and comedic flair. I was inspired by the “100 Ways to Walk” video by Kevin Parry, and after reviewing different types of walks, I settled on one that felt confident and animated; a perfect match for Tom’s larger-than-life energy.

Using SyncSketch, I analyzed the walk in detail, breaking it down into key poses, timing, and rhythm.
For the gameplay cycle pack, I went with Azula, one of the most intense and composed characters from Avatar: The Last Airbender. Her movements are sharp, precise, and always in control, which made her a compelling choice for a set of action-oriented animations like idle, walk, jump, and dive. I felt challenged (in the best way) to translate her controlled power into a game-friendly animation style, making sure that every motion felt deliberate and in-character. I used the TV show as reference on how she moves, and also using generic videogame animations I found on Maximo to have an idea on how the cycles should be.


Before animating, I took time to familiarize myself with both rigs, testing their limitations and capabilities. This exploration was necessary as it helped me avoid technical problems later and let me plan my poses with more confidence when beginning to animate. I also took time to get to know the tools from AnimBot, a Maya add-on which adds various tools and facilitates many processes on the whole workflow. I also used the Studio Library add-on to create a library of my main poses so I could accelerate the workflow.
To ensure a smooth and manageable production process, I began by creating a Gantt chart. This helped me visualize the project timeline, break down each animation into stages, and allocate realistic deadlines for pre-production, blocking, splining, polishing, and rendering. Sticking to the plan helped me avoid time crunches and gave me clarity on where to focus my energy each week.
Pre-Production and Reference Gathering
My first step was reference collection. For Tom’s walk cycle, I revisited Kevin Parry’s “100 Ways to Walk” and selected a confident, upbeat style that matched Tom’s classic personality. I imported the reference into SyncSketch, where I analyzed the key poses and refined the timing. For Azula, I used a mix of basic locomotion references from Mixamo, to get to know how jump and dive cycles worked, alongside scenes from the Avatar series to inspire the tone of her movement: grounded, efficient, and precise, which are characteristics of Azula’s personality as one of the villains in the show’s story.
I created a PureRef board to keep all visual references centralized: pose breakdowns, arcs, silhouettes, and secondary motion cues. This visual map stayed open throughout the process and helped me maintain consistency thoughout the different cycles.
Blocking and Animation
I animated all cycles in Maya 2025. I started by creating new scenes and referencing in the rig. The first stage was blocking in stepped mode, posing out the key storytelling poses. I paid close attention to the 12 Principles of Animation; especially anticipation, pose-to-pose, and silhouettes, to ensure the characters felt grounded and expressive.

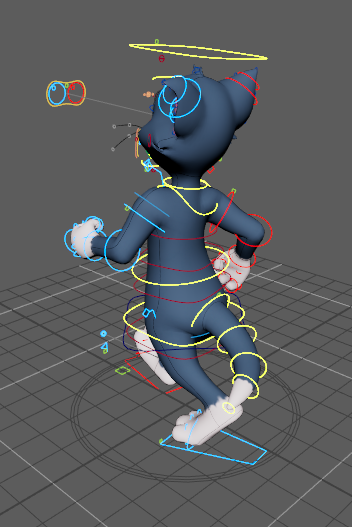

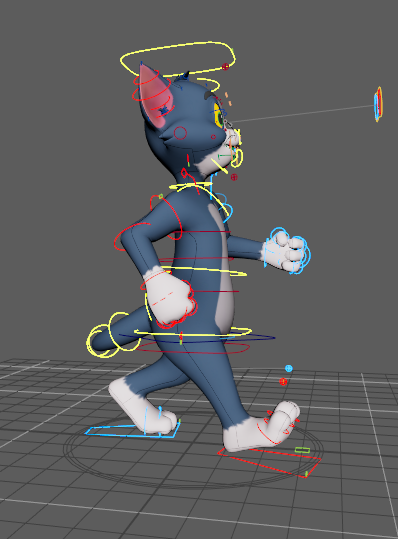


For both Tom and Azula, I started with strong key poses. For Tom’s confident walk, I focused on leading with the chest, exaggerating the arm swings, and adding subtle head tilts for personality. I also used as reference the With Azula, I emphasized balance and economy of movement, using sharp, clean lines and deliberate timing to reflect her controlled energy.
One of the trickiest challenges in this stage was deciding when to use FK versus IK. For example, in Azula’s dive, I opted for FK on the arms to get those sweeping, fluid arcs, but used IK on the legs to control foot placement more precisely. It took trial and error to get this balance right, and each cycle required different modes for the arms specially.
Once blocking was solid, I moved into breakdowns, refining spacing and adding in-between poses to smooth out the transitions. The Tweener tool from Animbot was very useful at this stage, as it facilitated the process of creating in betweens and then modifying them to my liking. At this stage, I wasn’t too focused on exact timing yet—my goal was to keep the poses working in motion, as I could edit the timing after getting the poses. Also, I ensured to be organized with my poses by using Animbot’s tools of tinting keys yellow for my inbetweens and red for the key poses. This way I could identify which poses were which.

Spline and Polish
Once I was happy with the breakdown poses, I switched the curves to spline interpolation and began the process of refining timing, spacing, and arcs. This was, by far, the most time-consuming stage of the workflow, but also the most rewarding.
Using Maya’s Graph Editor, I began smoothing the curves to achieve natural motion between poses. AnimBot has various tools that help to edit the curves in the graph editor, and I used them as a starting point at this stage, but manually editting them was the workflow I found most valuable.

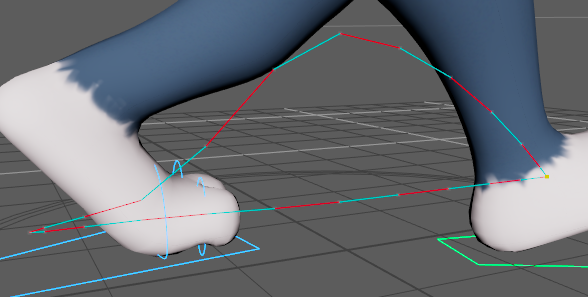
For Tom’s walk, I paid special attention to the easing in and out, ensuring the weight shift from one foot to the other felt believable. I made sure the hips followed a figure-eight pattern, giving his stride bounce and rhythm. To achieve this, I used a tool form AnimBot called Motino Trail to visualize the movement of a specific part or control. For Azula’s idle and jump cycles, I refined the overlapping motion in the arms and legs, adjusted follow-through for subtle head movements, and made sure arcs were clean and intentional.


I constantly referred back to my reference footage, my PureRef file and SyncSketch annotations to compare and evaluate the motion. The polish stage became a combination of subtle curve editing, reworking overshoots, and fine-tuning ease in/out to create that final layer of believability. I also used the ghosting (onion skinning) tool in Maya to track arcs and fix any pops or jittery transitions.
Rendering and Presentation
With the animation polished, the final step was rendering the cycles for presentation. I used Maya’s Playblast feature to export the animations, tweaking the settings to ensure the best visual fidelity. I enabled anti-aliasing, turned on ambient occlusion, and hiding the curves so the controls were not visible, and used a clean viewport setup with wireframe hidden and lighting enabled to highlight the character silhouettes and movement clearly.
Each cycle was rendered separately. For the walk cycles, I made sure to present the animation from a point of view where the body mechanics and spacing could be properly appreciated. For all the cycles, I used a looping cycle format so that the transitions could be observed smoothly.
I assembled all rendered clips into a video file using Premiere Pro, where I added the image sequences and exported them on movie formats. This also made it easier to showcase to classmates and industry professionals when asking for feedback.
Reflection and Feedback
Looking back on this project, I feel proud of how much I’ve progressed, especially in the areas of posing and imbuing the rigs with character and intent. I believe my strongest achievement was in the key poses, where I managed to capture distinctive attitudes and silhouettes that reflect each character’s personality. Azula’s poised confidence and Tom’s exaggerated cartoon charm both came through in ways I’m genuinely happy with.
Throughout the process, I actively sought feedback from classmates, industry friends via LinkedIn, and especially Alex during support sessions. These critiques were incredibly valuable. Some pushed me to rethink the timing of certain motions, others led to reworking poses that lacked clarity or felt too symmetrical. I learned not to be precious with my keys and be open to feedback and not take anything personal: if something didn’t read well or could be pushed further, I went back and adjusted it.
The polish stage taught me a great deal about the subtlety of animation. Cleaning up the curves in the graph editor was both the most time-consuming and the most educational part of the project. It’s also where I saw my work truly come to life: easing in and out, correcting spacing, and ensuring arcs felt smooth and deliberate.
If I were to redo this project, I would allocate more time to the final polish, as it made the biggest difference in quality and believability. Managing FK and IK switching was another technical hurdle that I now feel much more confident tackling in future work.
Ultimately, this project made me have more curiosity and respect for character animation workflow, as I was not familiar with it before this module and everthing was new to me. At the end, I found it to be very fulfiling work. By building on the 12 Principles of Animation, applying what I learned from the Walk Cycle and Breakdown Poses workshops, and studying strong references, I’ve sharpened both my eye and my skills. I know there’s still a long way to go, but this project was a meaningful step forward.
Closing Thoughts and Future Goals
This animation project has been one of the most rewarding challenges of the term. Not only did it push me to apply everything I’ve learned so far, from planning and referencing to spline and polish, but it also helped me find confidence in my own artistic voice.
Working with well-known characters like Azula and Tom was a great exercise in adapting animation to established personalities, while still making creative decisions that reflected my own instincts.
Looking ahead, I want to keep improving my ability to read and break down motion more effectively. Training my eye to notice subtleties in spacing, rhythm, and weight is something I’ll continue to focus on. I also aim to explore more complex animation systems, like layered animations and camera work, as I deepen my understanding of storytelling through movement.
This project has reminded me that animation is a craft built on patience, observation, and iteration, and I’m excited to keep going.


